New Releases |
Hidden Object Games |
Match 3 Games |
Time Management Games |
Strategy Games |
Puzzle Games |
Card Games |
Action Games |
Word Games
Dreamscapes: The Sandman Walkthrough 9

Dreamscapes: The Sandman Walkthrough 9
* OS: Windows 7 / Vista / XP
* CPU: Pentium 3 1.0 GHz or Higher
* OS: Windows 7 / Vista / XP
* CPU: Pentium 3 1.0 GHz or Higher

Dreamscapes: The Sandman Walkthrough 9
* OS: Windows 7 / Vista / XP
* CPU: Pentium 3 1.0 GHz or Higher
* OS: Windows 7 / Vista / XP
* CPU: Pentium 3 1.0 GHz or Higher
Dreamscapes: The Sandman Walkthrough 9 Screenshots, Videos:


Follow our crystal clear walkthrough and helpful tricks to get you through the rough spots! Click the button to download full walkthrough.
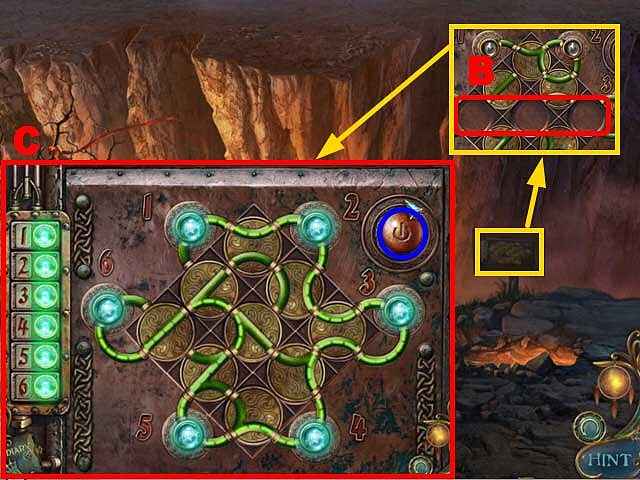
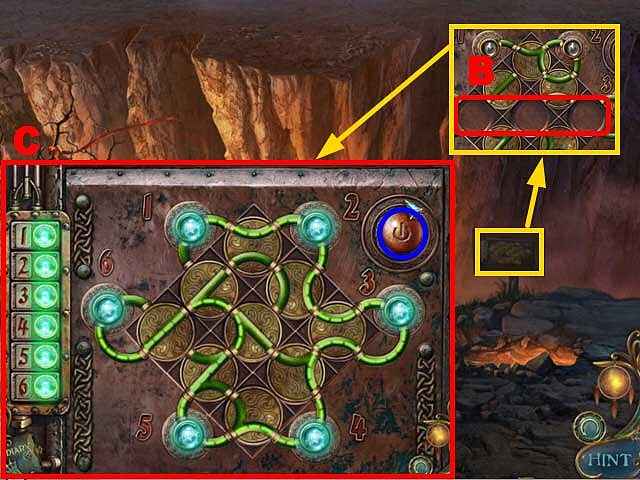
Zoom into the control panel; insert the 3 CIRCUITRIES into the empty slots (B).
Play the mini-game.
To solve this puzzle (C), swap the circuitry parts so that the electricity flows from lamp 1-6.
Press the power button (blue) to complete the puzzle.
Move forward.
Zoom into the pouch and open it; take the PAPER LAURA (D).
Walk down.
Take the RIBBON (E).
Move forward twice.
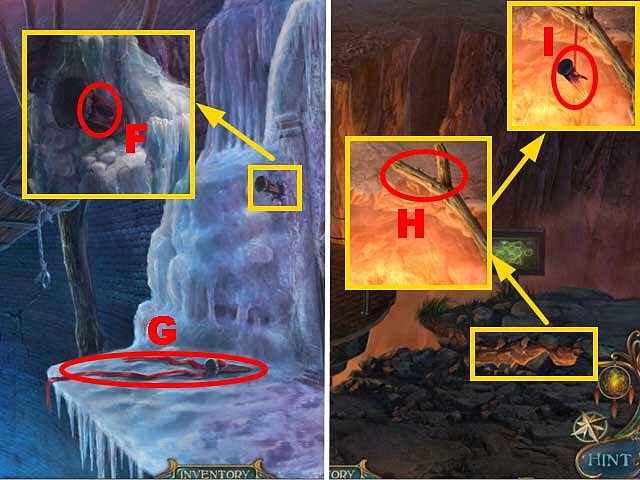
Zoom into the chisel and connect the RIBBON to it (F); pull the ribbon.
Take the CHISEL (G).
Walk down twice.
Zoom into the pit; connect the CHISEL to the branch (H).
Take the HOT CHISEL (I).
Move forward twice.


 REFRESH