
New Releases |
Hidden Object Games |
Match 3 Games |
Time Management Games |
Strategy Games |
Puzzle Games |
Card Games |
Action Games |
Word Games
Fearful Tales: Hansel and Gretel Walkthrough 11

Fearful Tales: Hansel and Gretel Walkthrough 11
* OS: Windows 7 / Vista / XP
* CPU: Pentium 3 1.0 GHz or Higher
* OS: Windows 7 / Vista / XP
* CPU: Pentium 3 1.0 GHz or Higher
Fearful Tales: Hansel and Gretel Walkthrough 11
* OS: Windows 7 / Vista / XP
* CPU: Pentium 3 1.0 GHz or Higher
* OS: Windows 7 / Vista / XP
* CPU: Pentium 3 1.0 GHz or Higher
Fearful Tales: Hansel and Gretel Walkthrough 11 Screenshots, Videos:
Follow our crystal clear walkthrough and helpful tricks to get you through the rough spots! Click the button to download full walkthrough.
Take the SHARP NUTSHELL (F).
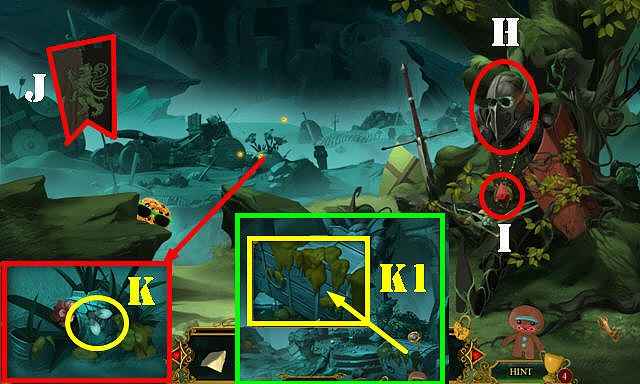
Go left to the Battlefield Remains (G).
Talk to the knight (H).
Take the AMULET PIECE 1/3 (I).
Move the flag (J) and take the GUNPOWDER SACK.
Use the EMPTY JAR to get the MOSS-EATING MOTH (K).
Go forward to Castle Ruins.
Zoom into the chest and use the MOSS-EATING MOTH on it to activate a HOP (K1).
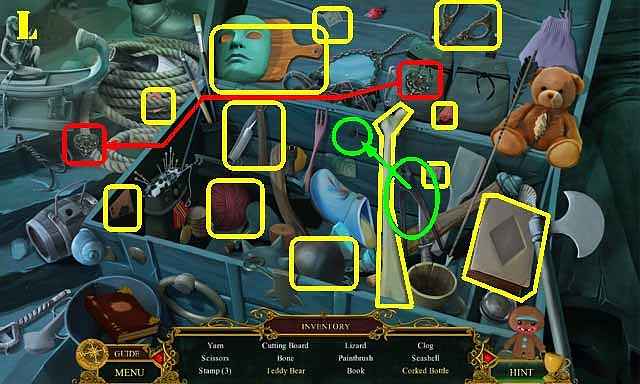
Play the HOP.
You receive the AMULET PIECE 2/3 (L).
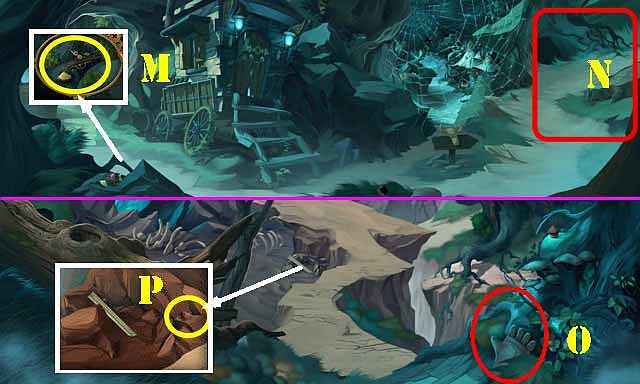
Walk down twice.
Use the GUNPOWDER SACK on the lighter; take the FLINTLOCK LIGHTER (M).
Head right to the Lynx Den (N).
Take the 2/2 WORK GLOVES (O).
Take the 3/3 AMULET PIECE (P).
Walk down.
Take the SHARP NUTSHELL (F).
Go left to the Battlefield Remains (G).
Talk to the knight (H).
Take the AMULET PIECE 1/3 (I).
Move the flag (J) and take the GUNPOWDER SACK.
Use the EMPTY JAR to get the MOSS-EATING MOTH (K).
Go forward to Castle Ruins.
Zoom into the chest and use the MOSS-EATING MOTH on it to activate a HOP (K1).
Play the HOP.
You receive the AMULET PIECE 2/3 (L).
Walk down twice.
Use the GUNPOWDER SACK on the lighter; take the FLINTLOCK LIGHTER (M).
Head right to the Lynx Den (N).
Take the 2/2 WORK GLOVES (O).
Take the 3/3 AMULET PIECE (P).
Walk down.


 REFRESH