
New Releases |
Hidden Object Games |
Match 3 Games |
Time Management Games |
Strategy Games |
Puzzle Games |
Card Games |
Action Games |
Word Games
League of Light: Dark Omens Walkthrough 9

League of Light: Dark Omens Walkthrough 9
* OS: Windows 7 / Vista / XP
* CPU: Pentium 3 1.0 GHz or Higher
* OS: Windows 7 / Vista / XP
* CPU: Pentium 3 1.0 GHz or Higher
League of Light: Dark Omens Walkthrough 9
* OS: Windows 7 / Vista / XP
* CPU: Pentium 3 1.0 GHz or Higher
* OS: Windows 7 / Vista / XP
* CPU: Pentium 3 1.0 GHz or Higher
League of Light: Dark Omens Walkthrough 9 Screenshots, Videos:
Follow our crystal clear walkthrough and helpful tricks to get you through the rough spots! Click the button to download full walkthrough.
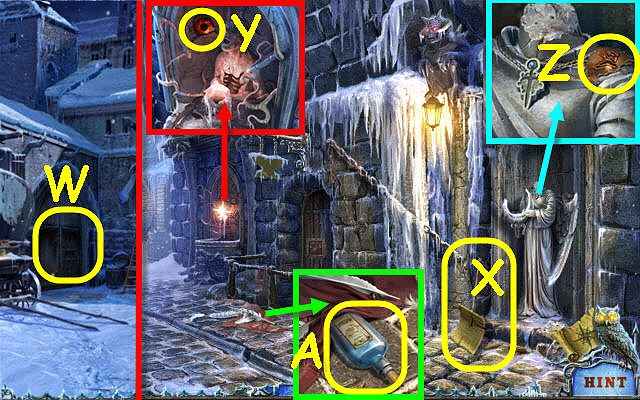
Examine the left door; use the SAW on it (W).
Go left through the newly-opened door.
Take the SNOW SHOVEL (X).
Examine the fountain; take the RUBY EYE (Y).
Examine the statue; take the LEATHER FACE 1/2 (Z).
Examine the cloth and move it; read the note and take the SILVER IDENTIFIER (A).
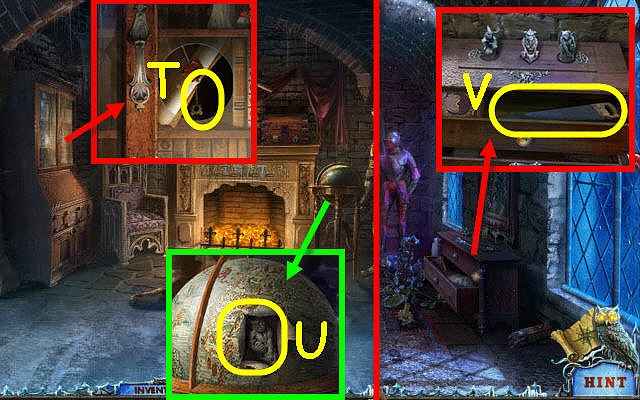
Attempt to go up the path on the left.
Back out; go up the stairs and through the left door.
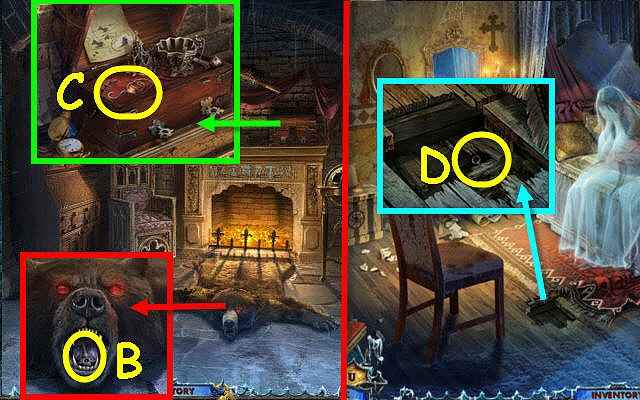
Examine the bear and place the RUBY EYE in the socket; take the 2nd KEY (B).
Examine the chest and use the 2 KEYS in the locks; take the HOOK (C).
Back out twice and go up the ladder.
Examine the hole in the floor; use the HOOK to get the SWORD PENDANT (D).
Back out and go left.
Examine the left door; use the SAW on it (W).
Go left through the newly-opened door.
Take the SNOW SHOVEL (X).
Examine the fountain; take the RUBY EYE (Y).
Examine the statue; take the LEATHER FACE 1/2 (Z).
Examine the cloth and move it; read the note and take the SILVER IDENTIFIER (A).
Attempt to go up the path on the left.
Back out; go up the stairs and through the left door.
Examine the bear and place the RUBY EYE in the socket; take the 2nd KEY (B).
Examine the chest and use the 2 KEYS in the locks; take the HOOK (C).
Back out twice and go up the ladder.
Examine the hole in the floor; use the HOOK to get the SWORD PENDANT (D).
Back out and go left.


 REFRESH