New Releases |
Hidden Object Games |
Match 3 Games |
Time Management Games |
Strategy Games |
Puzzle Games |
Card Games |
Action Games |
Word Games
Mystery Tales: The Lost Hope Walkthrough 9

Mystery Tales: The Lost Hope Walkthrough 9
* OS: Windows 7 / Vista / XP
* CPU: Pentium 3 1.0 GHz or Higher
* OS: Windows 7 / Vista / XP
* CPU: Pentium 3 1.0 GHz or Higher

Mystery Tales: The Lost Hope Walkthrough 9
* OS: Windows 7 / Vista / XP
* CPU: Pentium 3 1.0 GHz or Higher
* OS: Windows 7 / Vista / XP
* CPU: Pentium 3 1.0 GHz or Higher
Mystery Tales: The Lost Hope Walkthrough 9 Screenshots, Videos:


Follow our crystal clear walkthrough and helpful tricks to get you through the rough spots! Click the button to download full walkthrough.
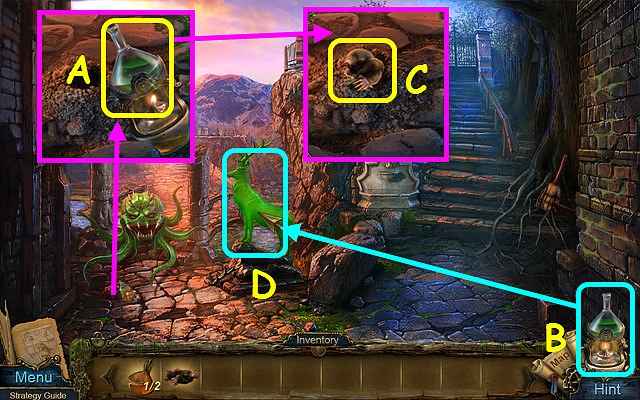
Take the CRUCIBLE (A). It will now sit on the right side
of your menu bar (B).
Use the GRASSHOPPER on the hole; take the MOLE (C).
Use the CRUCIBLE on the deer (D).
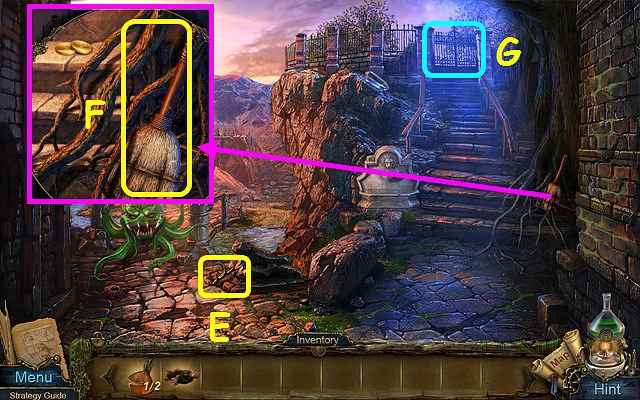
Take the HORN (E).
Take the BROOM (F).
Note the Cemetery gate (G).
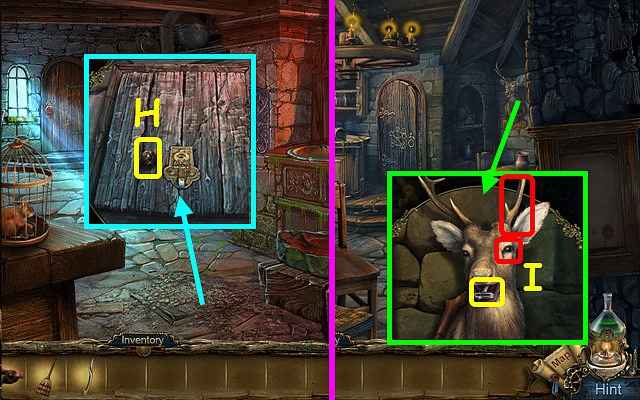
Walk down, enter the Tavern, and go forward to the Kitchen.
Use the BROOM to remove the dirt; take the EYE (H).
Walk down.
Place the HORN and the EYE on the deer;
take the CEMETERY KEY (I).
Walk down and forward.
Use the CEMETERY KEY on the lock and walk forward.








 REFRESH