New Releases |
Hidden Object Games |
Match 3 Games |
Time Management Games |
Strategy Games |
Puzzle Games |
Card Games |
Action Games |
Word Games
Portal of Evil:Stolen Runes Walkthrough 7

Portal of Evil:Stolen Runes Walkthrough 7
* OS: Windows 7 / Vista / XP
* CPU: Pentium 3 1.0 GHz or Higher
* OS: Windows 7 / Vista / XP
* CPU: Pentium 3 1.0 GHz or Higher

Portal of Evil:Stolen Runes Walkthrough 7
* OS: Windows 7 / Vista / XP
* CPU: Pentium 3 1.0 GHz or Higher
* OS: Windows 7 / Vista / XP
* CPU: Pentium 3 1.0 GHz or Higher
Portal of Evil:Stolen Runes Walkthrough 7 Screenshots, Videos:


Follow our crystal clear walkthrough and helpful tricks to get you through the rough spots! Click the button to download full walkthrough.
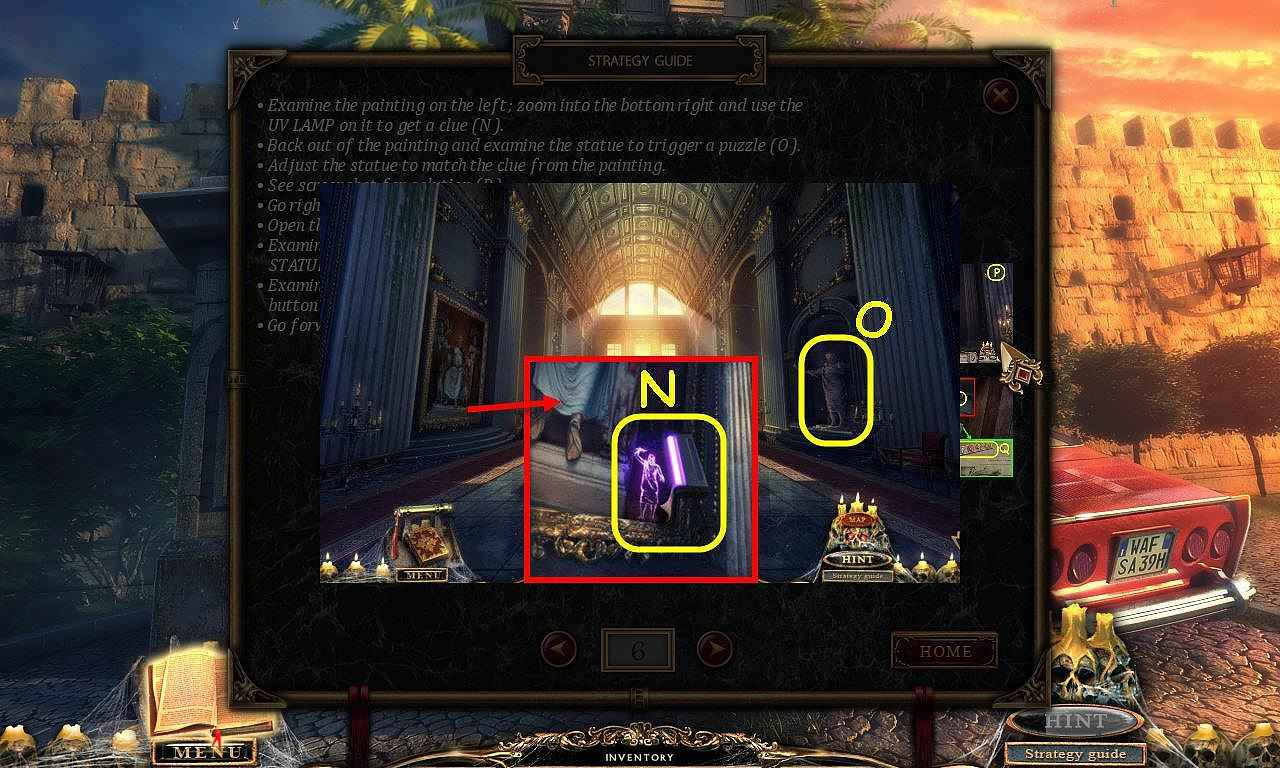
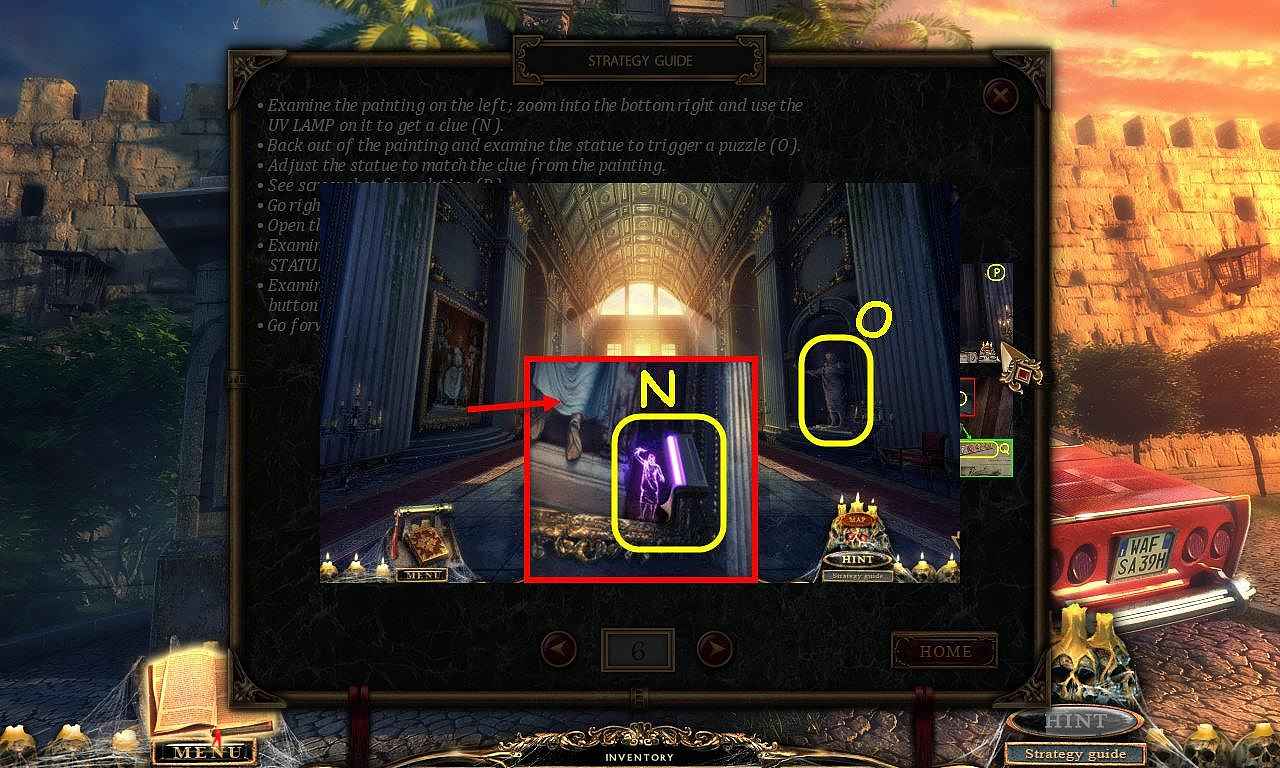
Examine the painting on the left; zoom into the bottom right and use the UV LAMP on it to get a clue (N).
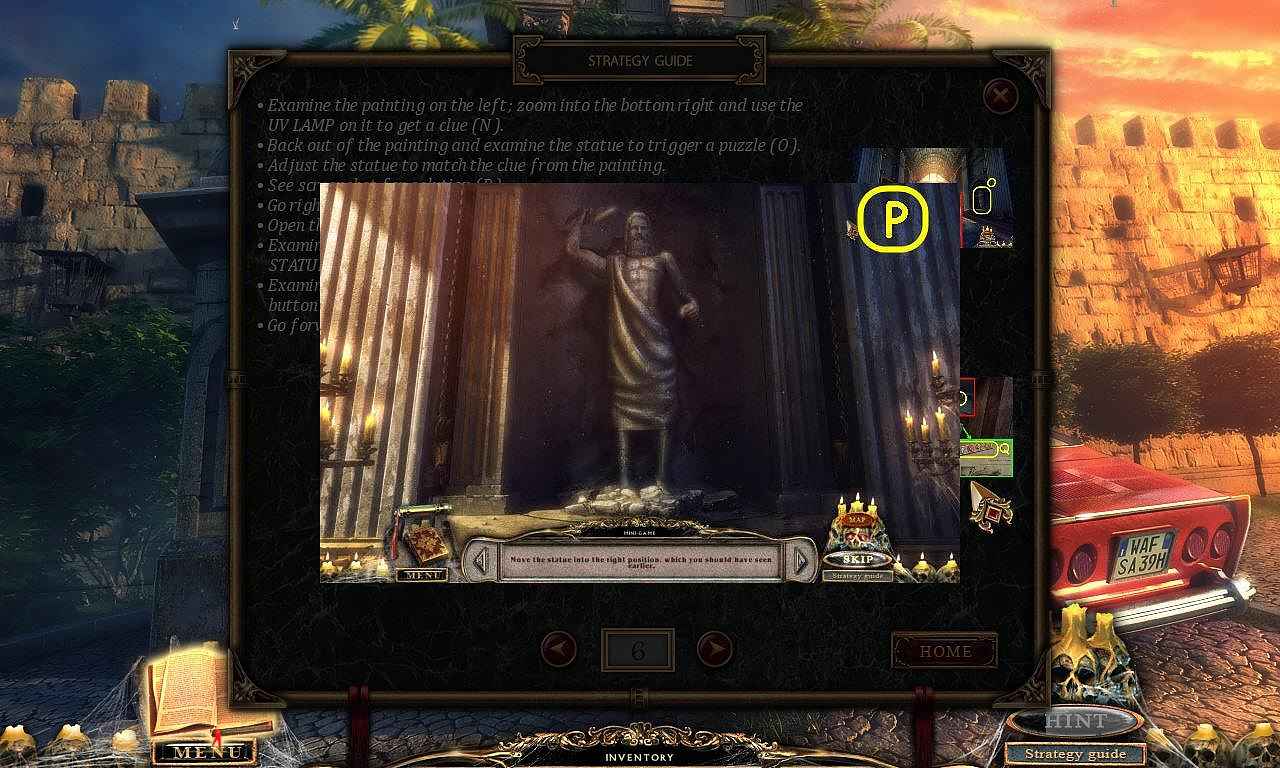
Back out of the painting and examine the statue to trigger a puzzle (O).
Adjust the statue to match the clue from the painting.
See screenshot for solution (P).
Go right into the elevator.
Open the newspaper; take the TEMPLATE (Q).
Examine the grate and use the SCREWDRIVER on the 4 screws; take the STATUETTE (R).
Examine the panel and use the PASSCARD on the reader; press the down button (S).
Go forward.


 REFRESH