New Releases |
Hidden Object Games |
Match 3 Games |
Time Management Games |
Strategy Games |
Puzzle Games |
Card Games |
Action Games |
Word Games
Portal of Evil:Stolen Runes Walkthrough 8

Portal of Evil:Stolen Runes Walkthrough 8
* OS: Windows 7 / Vista / XP
* CPU: Pentium 3 1.0 GHz or Higher
* OS: Windows 7 / Vista / XP
* CPU: Pentium 3 1.0 GHz or Higher

Portal of Evil:Stolen Runes Walkthrough 8
* OS: Windows 7 / Vista / XP
* CPU: Pentium 3 1.0 GHz or Higher
* OS: Windows 7 / Vista / XP
* CPU: Pentium 3 1.0 GHz or Higher
Portal of Evil:Stolen Runes Walkthrough 8 Screenshots, Videos:


Follow our crystal clear walkthrough and helpful tricks to get you through the rough spots! Click the button to download full walkthrough.
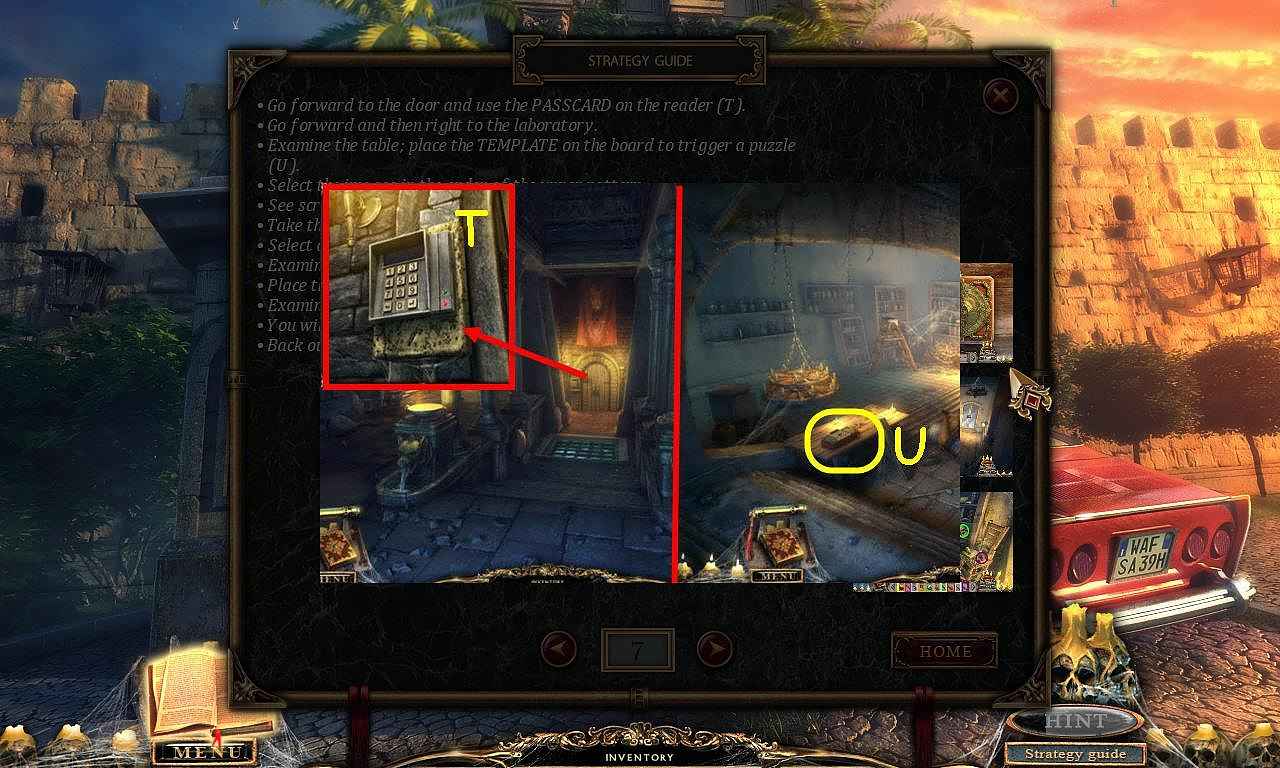
Go forward to the door and use the PASSCARD on the reader (T).
Go forward and then right to the laboratory.
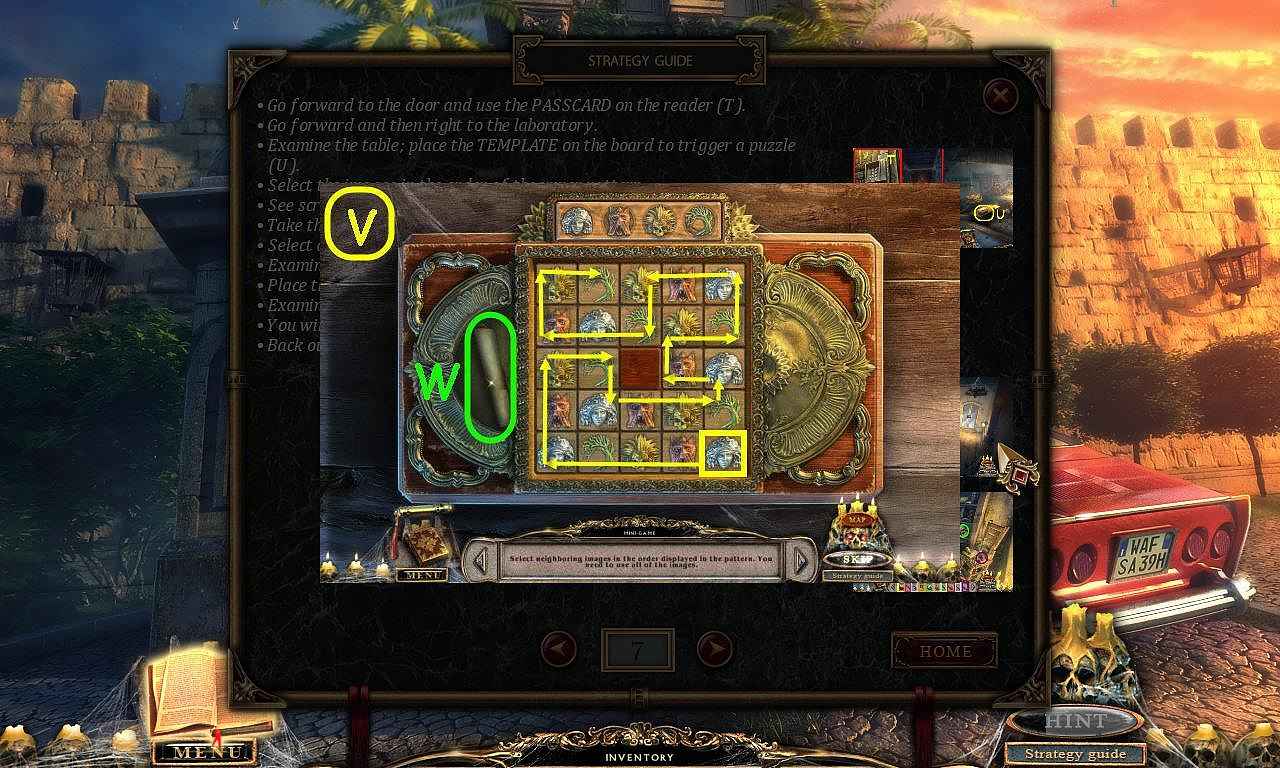
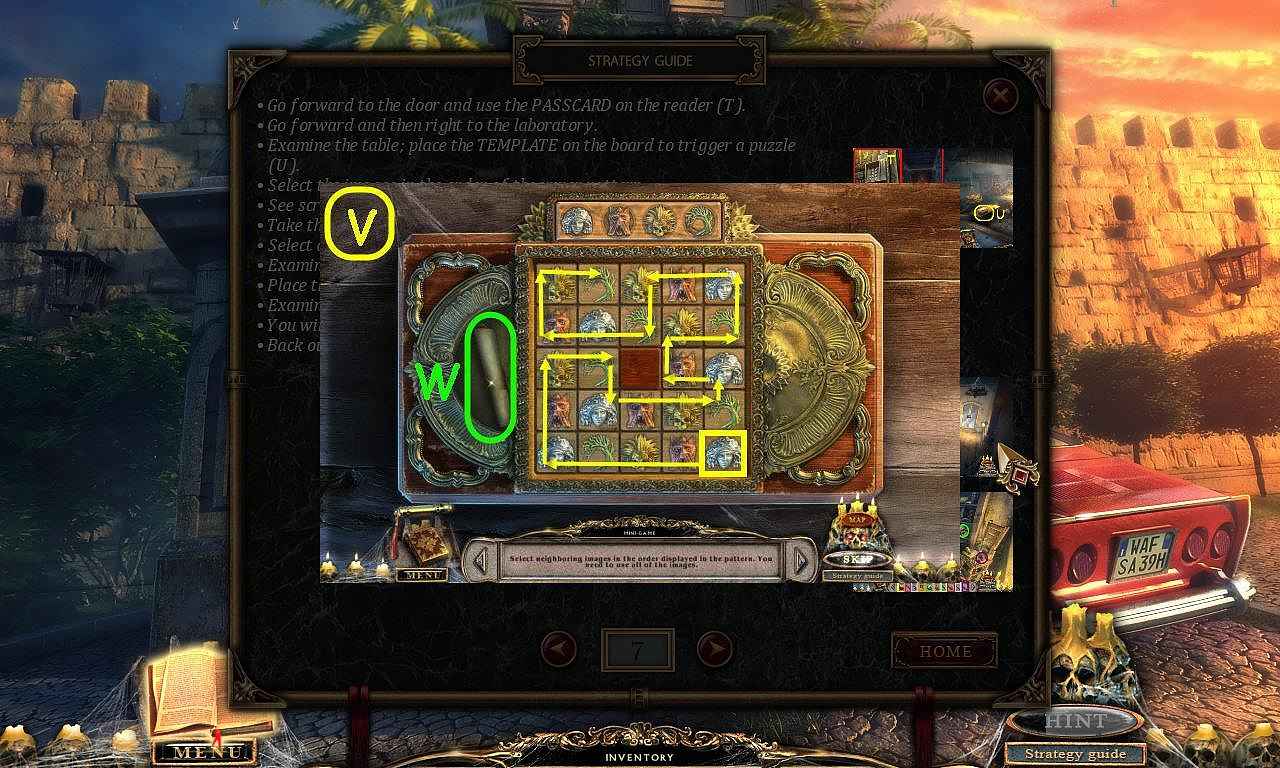
Examine the table; place the TEMPLATE on the board to trigger a puzzle (U).
Select the images in the order of the upper pattern.
See screenshot for solution (V).
Take the HALF OF THE DIAGRAM (W).
Select anywhere to speak to the strange guy (X).
Examine the corner to trigger a HOP (Y).
Place the items where they belong in the scene.
Examine the box to place some items (Z).
You will earn a KEY.
Back out.


 REFRESH