
New Releases |
Hidden Object Games |
Match 3 Games |
Time Management Games |
Strategy Games |
Puzzle Games |
Card Games |
Action Games |
Word Games
PuppetShow: Destiny Undone Walkthrough 13

PuppetShow: Destiny Undone Walkthrough 13
* OS: Windows 7 / Vista / XP
* CPU: Pentium 3 1.0 GHz or Higher
* OS: Windows 7 / Vista / XP
* CPU: Pentium 3 1.0 GHz or Higher
PuppetShow: Destiny Undone Walkthrough 13
* OS: Windows 7 / Vista / XP
* CPU: Pentium 3 1.0 GHz or Higher
* OS: Windows 7 / Vista / XP
* CPU: Pentium 3 1.0 GHz or Higher
PuppetShow: Destiny Undone Walkthrough 13 Screenshots, Videos:

Follow our crystal clear walkthrough and helpful tricks to get you through the rough spots! Click the button to download full walkthrough.
* Play the HOP.
* Use the key (1) in the lock (2) and take the crown (3).
* Place the crown on the head (4) and take the heart (5).
* Place the heart in the slot (6) and take the pointe (7).
* Place the pointe in the slot (8) and take the violin bow (9).
* Use the violin bow on the cello (10) and take the crab (11).
* Place the crab in the slot (12) and take the cat (13).
* Zoom into the picture and remove the cobwebs (14) with the broom (15). Put the cat down.
* Position the cats (16) according to the clue on the picture. Hint: look at the shape of the hats. Select two cats to swap their positions to complete the first part of the puzzle.
* Select a slot and all available slots will be highlighted; move a picture fragment to the right slot. Swap the hat pieces until they form the image on the screenshot (17) to solve the second part of the puzzle.
* Take the JUGGLING BALL (18).
* Zoom into the juggler and give him the JUGGLING BALL to receive the BUTTON (19).
* Walk down.
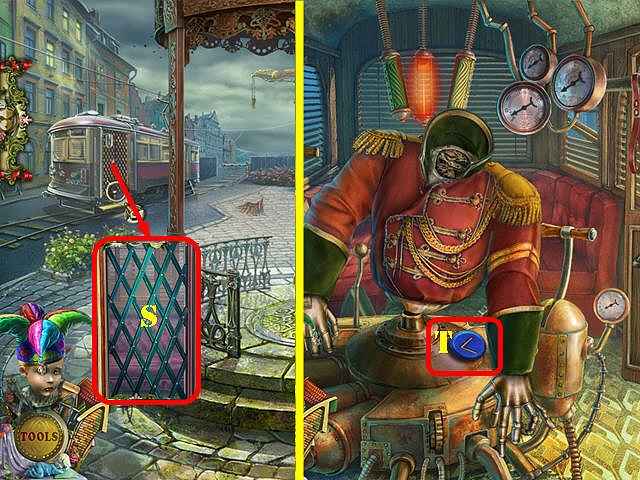
* Zoom into the doorway; place the VIOLET TRAM and the GREEN TRAM on the puzzle (20) to activate it.
* Play the HOP.
* Use the key (1) in the lock (2) and take the crown (3).
* Place the crown on the head (4) and take the heart (5).
* Place the heart in the slot (6) and take the pointe (7).
* Place the pointe in the slot (8) and take the violin bow (9).
* Use the violin bow on the cello (10) and take the crab (11).
* Place the crab in the slot (12) and take the cat (13).
* Zoom into the picture and remove the cobwebs (14) with the broom (15). Put the cat down.
* Position the cats (16) according to the clue on the picture. Hint: look at the shape of the hats. Select two cats to swap their positions to complete the first part of the puzzle.
* Select a slot and all available slots will be highlighted; move a picture fragment to the right slot. Swap the hat pieces until they form the image on the screenshot (17) to solve the second part of the puzzle.
* Take the JUGGLING BALL (18).
* Zoom into the juggler and give him the JUGGLING BALL to receive the BUTTON (19).
* Walk down.
* Zoom into the doorway; place the VIOLET TRAM and the GREEN TRAM on the puzzle (20) to activate it.


 REFRESH