New Releases |
Hidden Object Games |
Match 3 Games |
Time Management Games |
Strategy Games |
Puzzle Games |
Card Games |
Action Games |
Word Games
True Fear: Forsaken Souls Part 2 Walkthrough
True Fear: Forsaken Souls Part 2 Walkthrough
* OS: Windows 7 / Vista / XP
* CPU: Pentium 3 1.0 GHz or Higher
* OS: Windows 7 / Vista / XP
* CPU: Pentium 3 1.0 GHz or Higher

True Fear: Forsaken Souls Part 2 Walkthrough
* OS: Windows 7 / Vista / XP
* CPU: Pentium 3 1.0 GHz or Higher
* OS: Windows 7 / Vista / XP
* CPU: Pentium 3 1.0 GHz or Higher
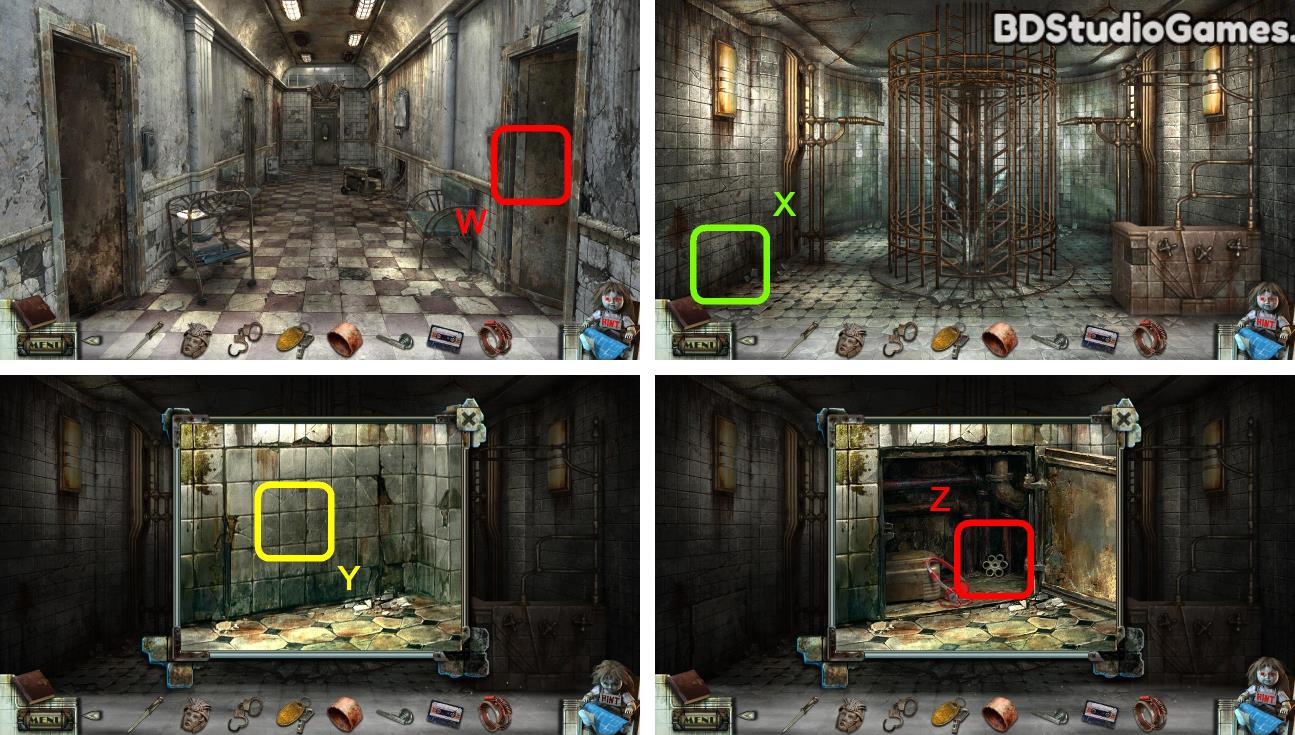
Go Here. (W)
Examine here. (X)
Click Here. (Y)
Take it. (Z)
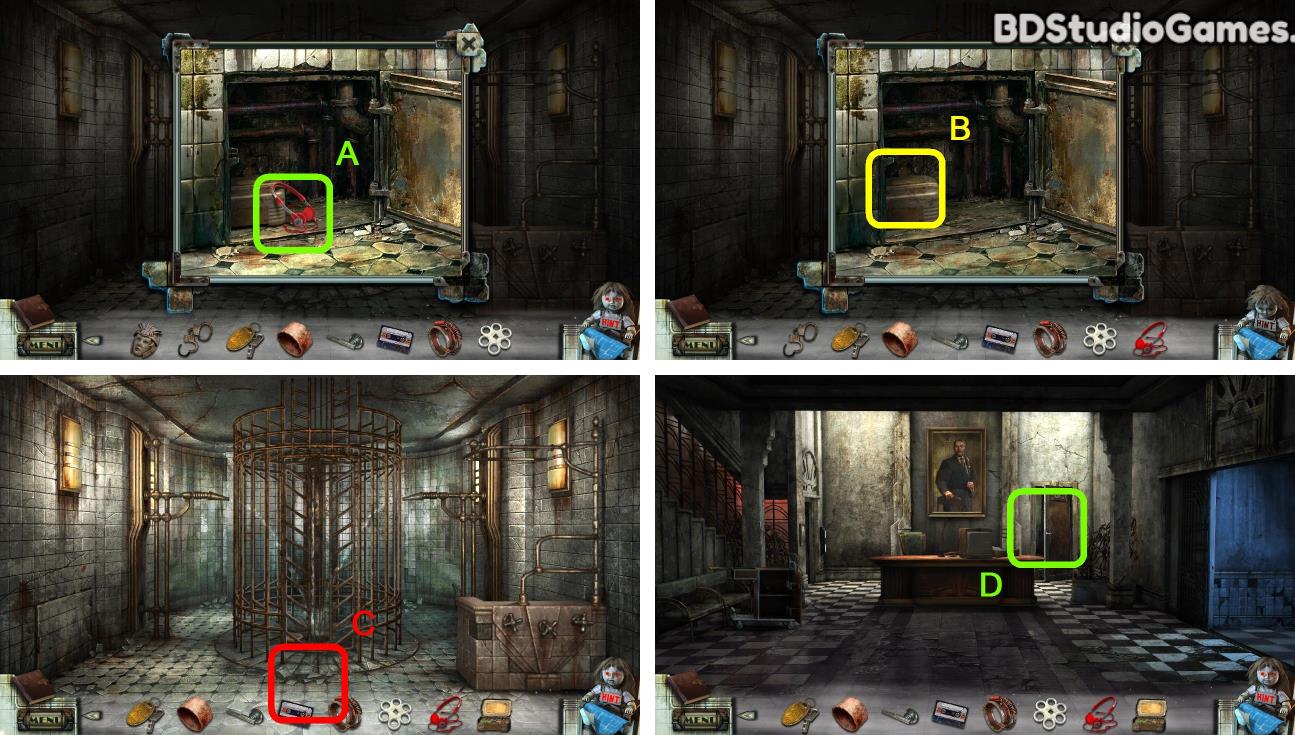
Take it. (A)
Take it. (B)
Go Here. (C)
Go Here. (D)
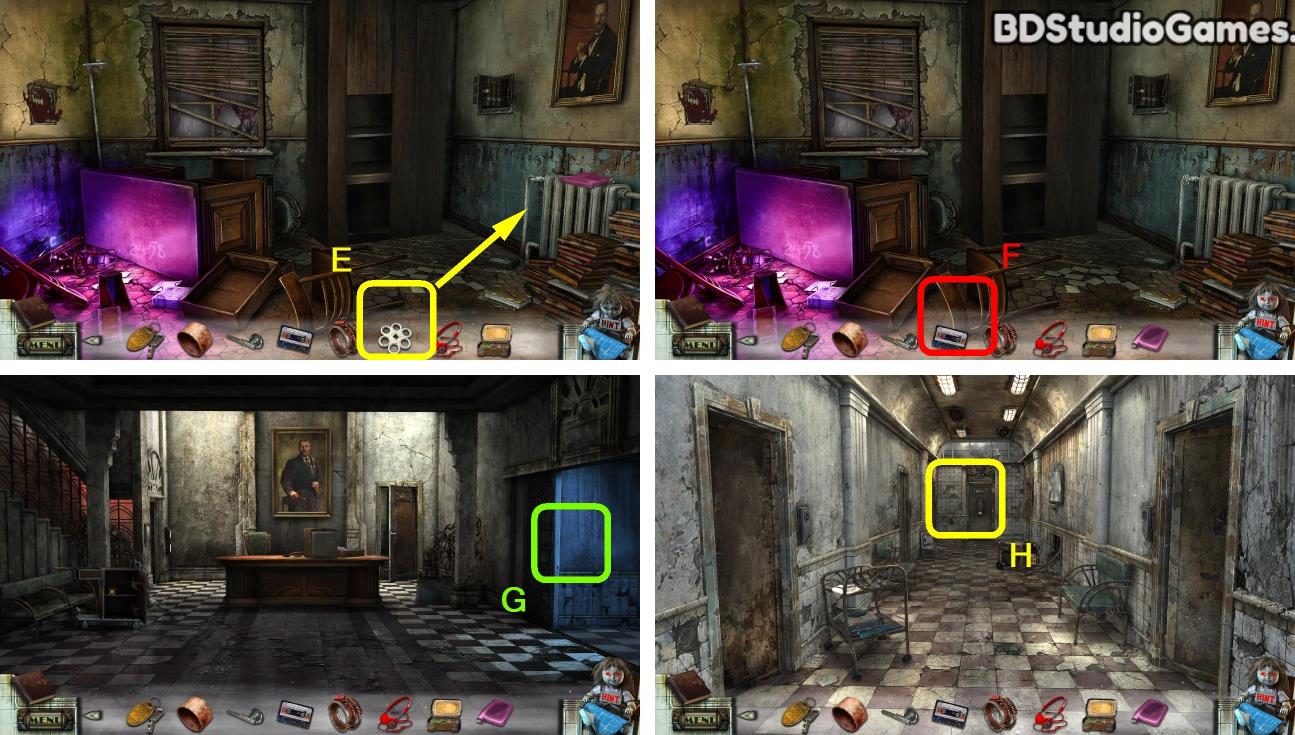
Use object on here. (E)
Go Here. (F)
Go Here. (G)
Go Here. (H)
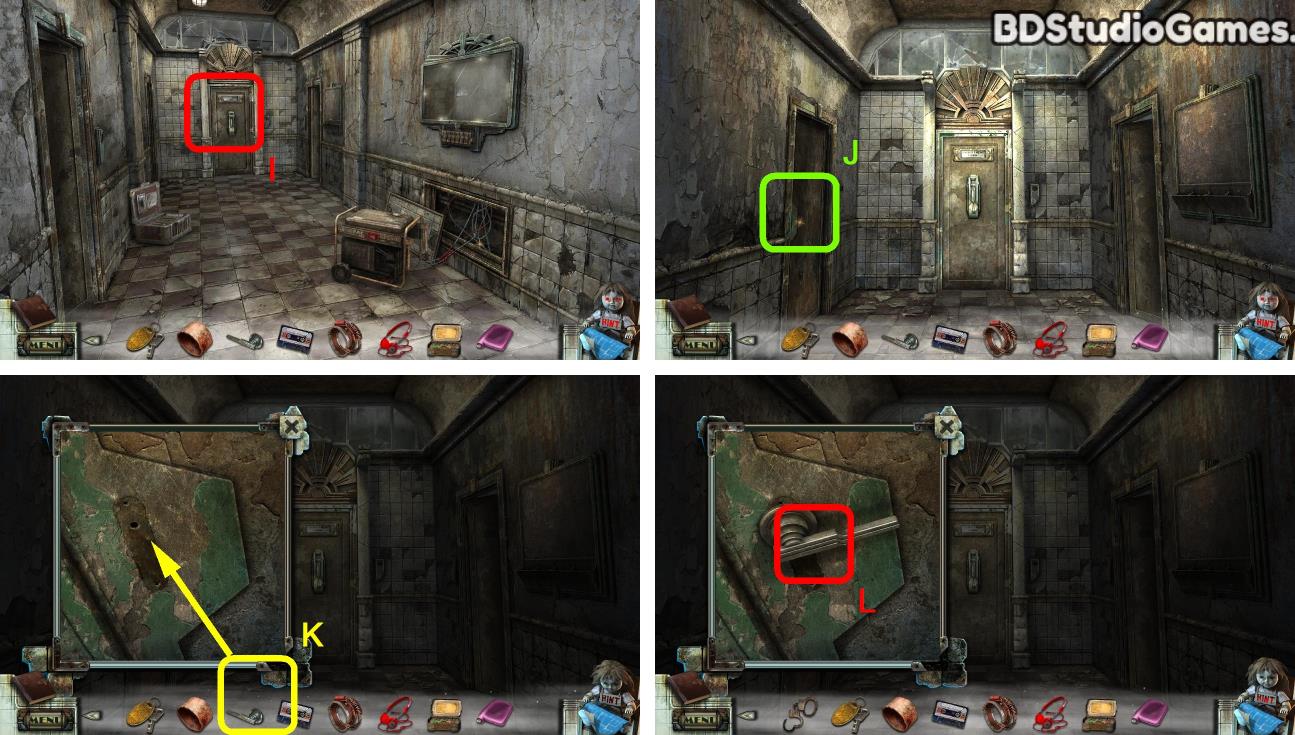
Go Here. (I)
Examine here. (J)
Use object on here. (K)
Click Here. (L)
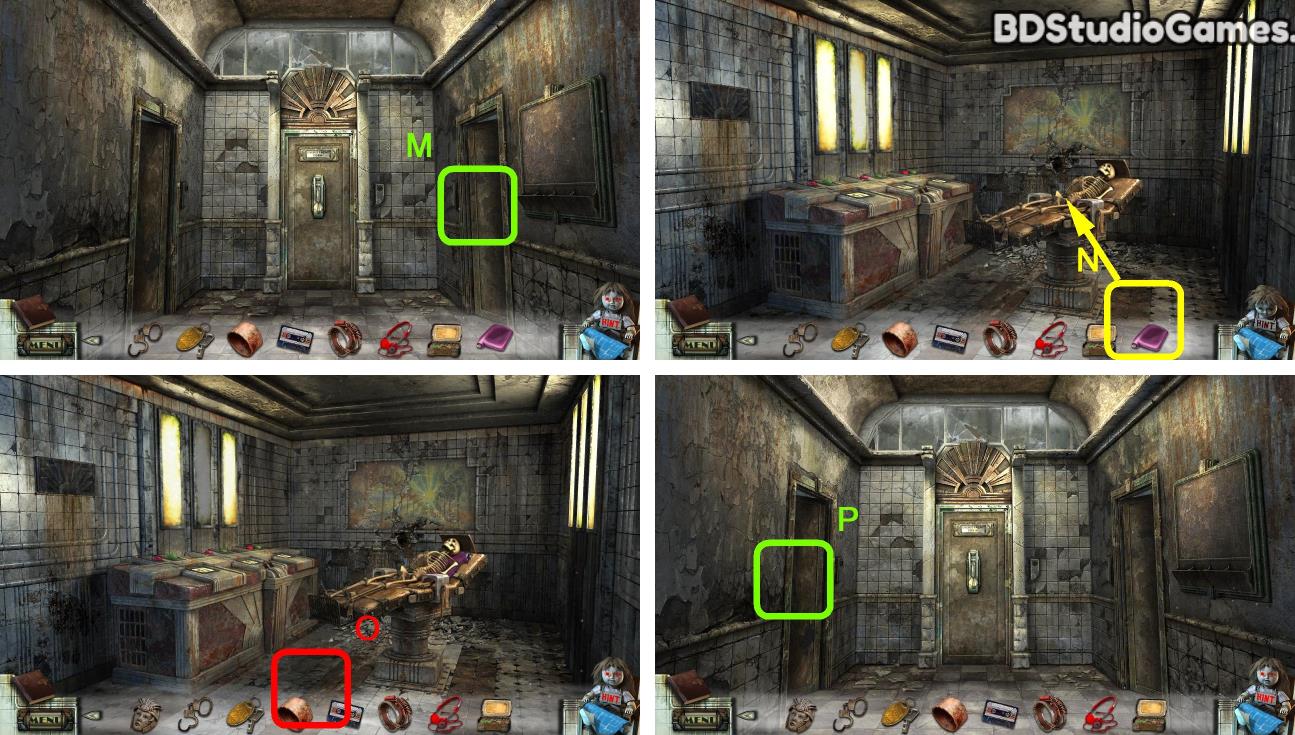
Go Here. (M)
Use object on here. (N)
Go Here. (O)
Go Here. (P)
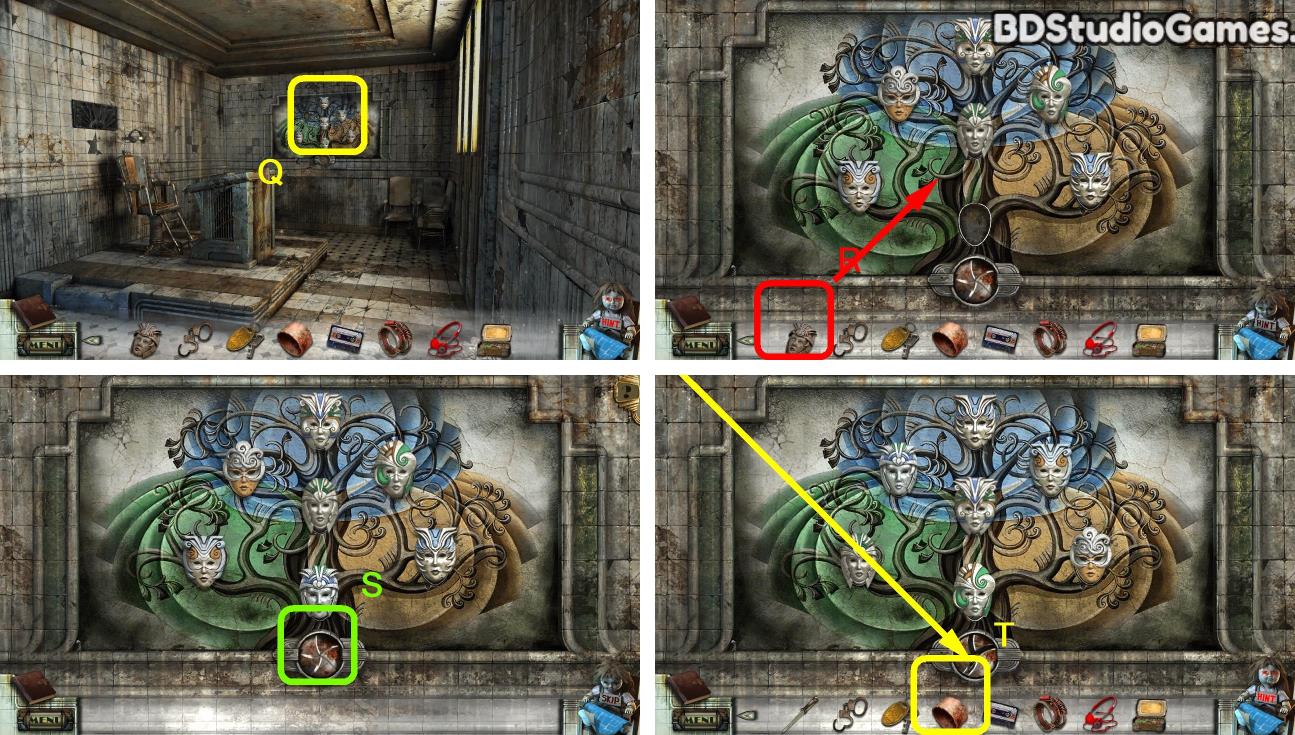
Examine here. (Q)
Use object on here. (R)
Solve the puzzle. (S)
Use object on here. (T)
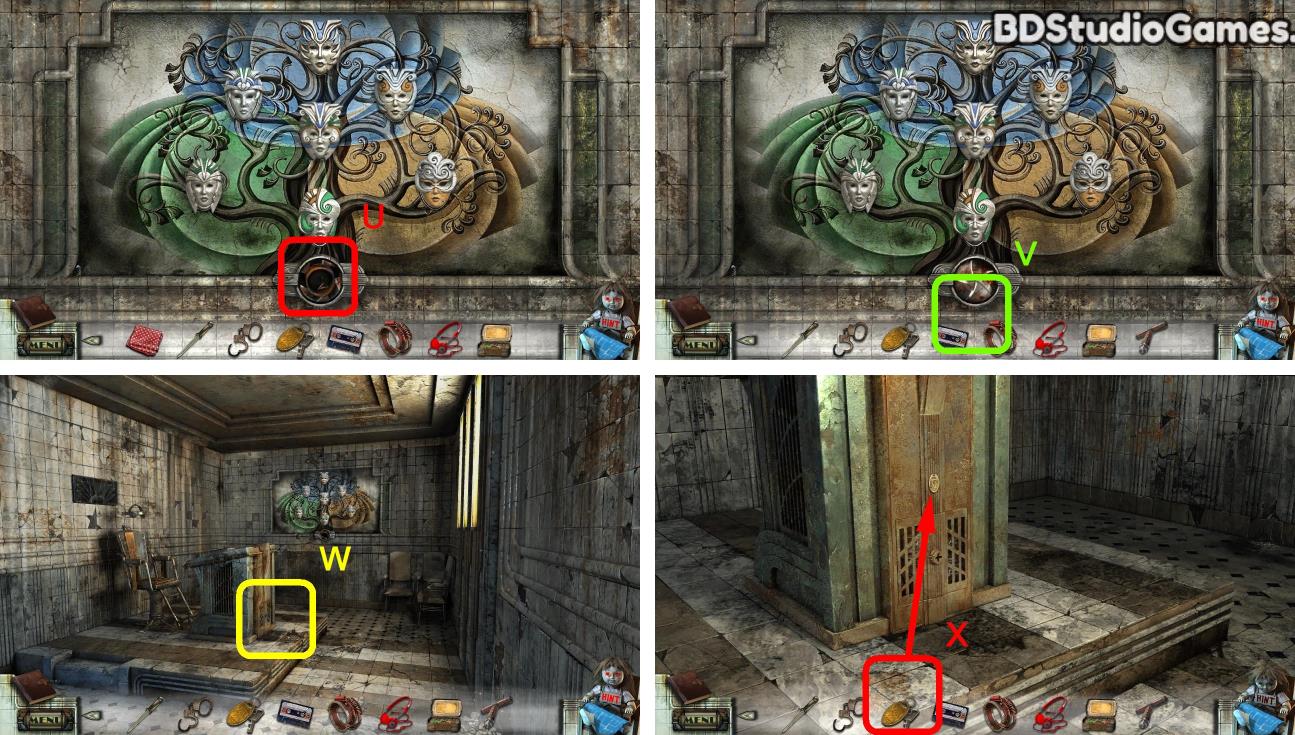
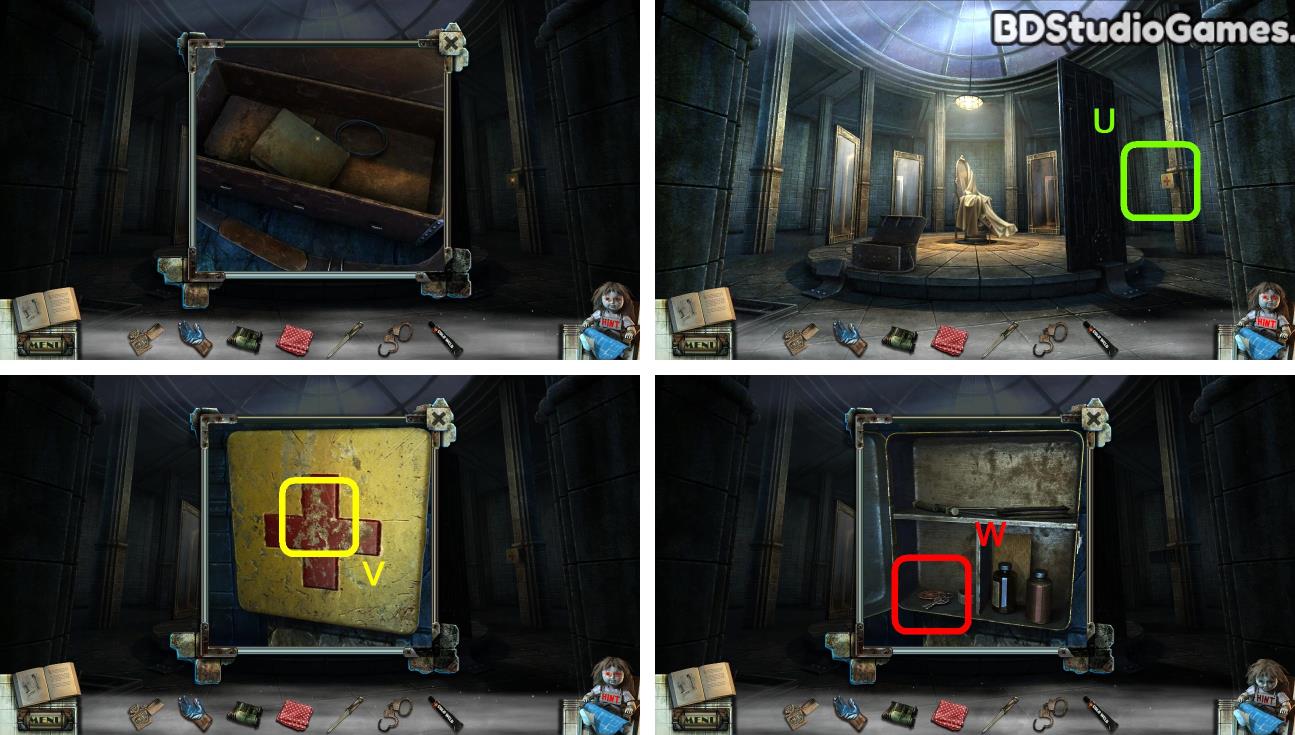
Take it. (U)
Go Here. (V)
Examine here. (W)
Use object on here. (X)
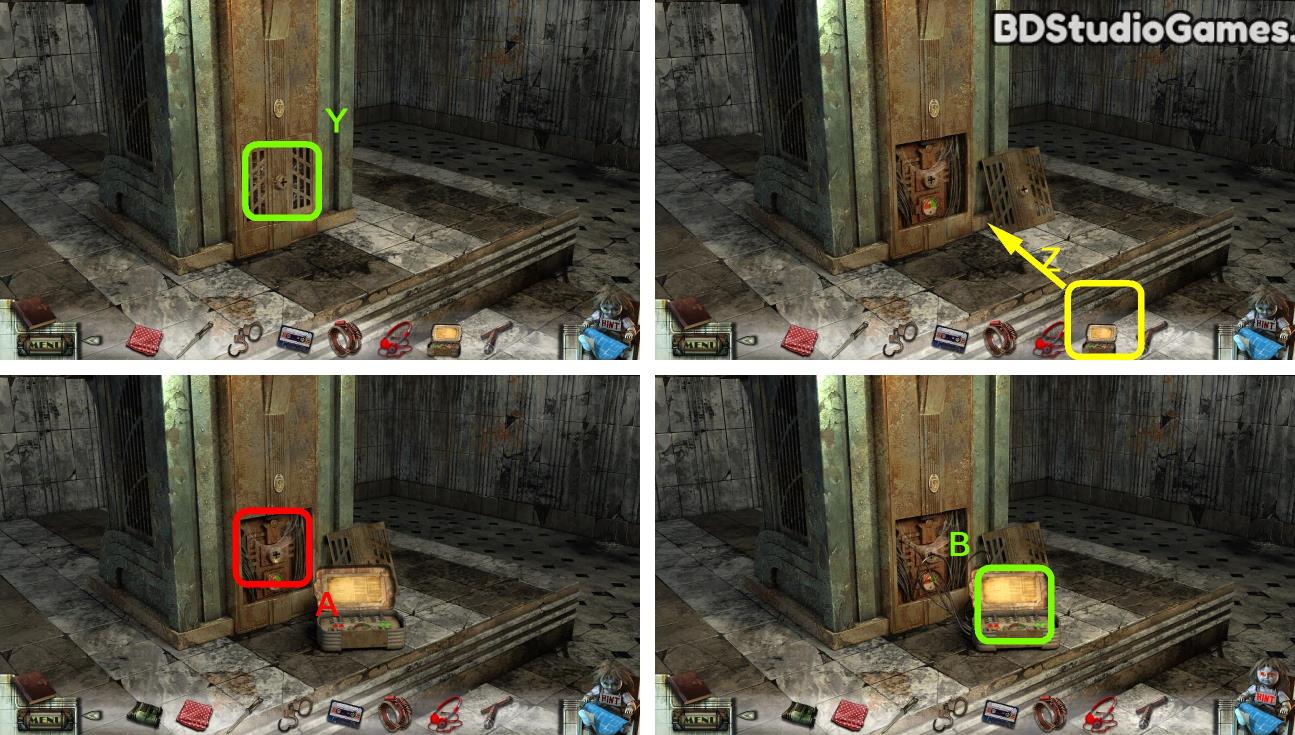
Click Here. (Y)
Use object on here. (Z)
Click Here. (A)
Examine here. (B)
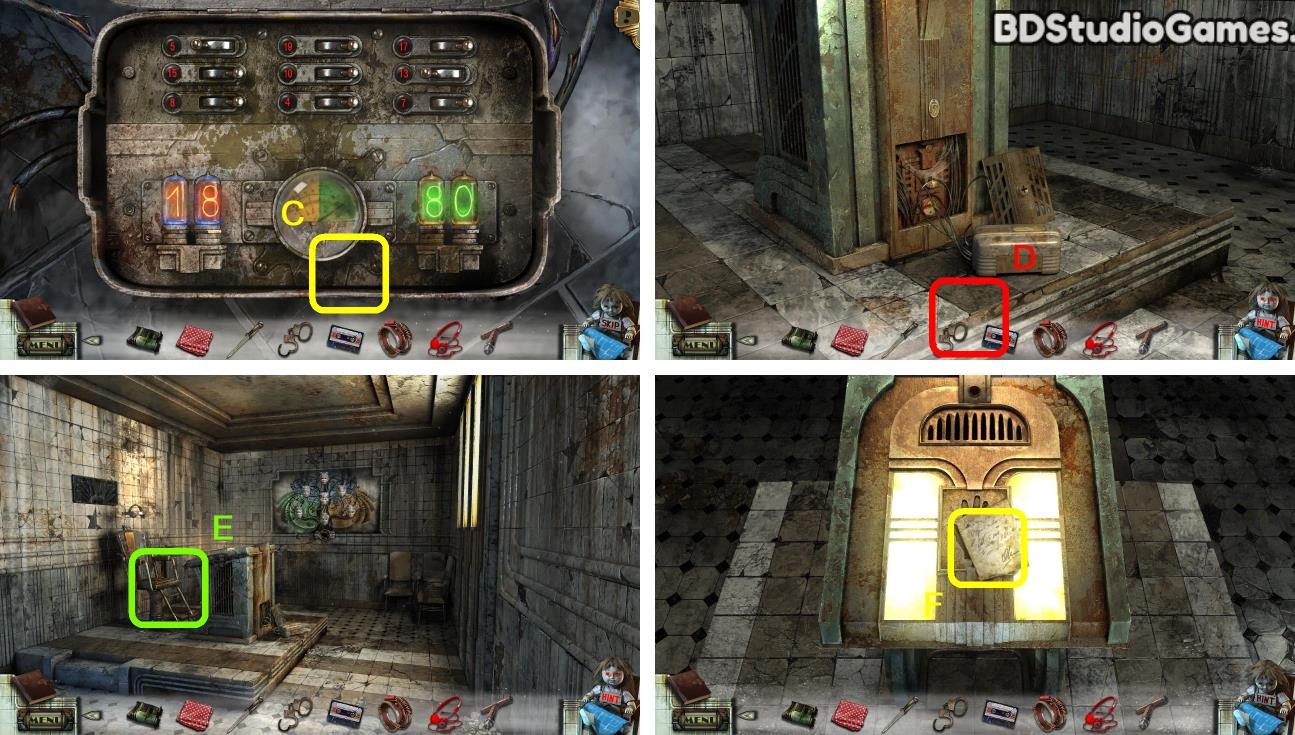
Solve the puzzle. (C)
Go Here. (D)
Examine here. (E)
Click Here. (F)
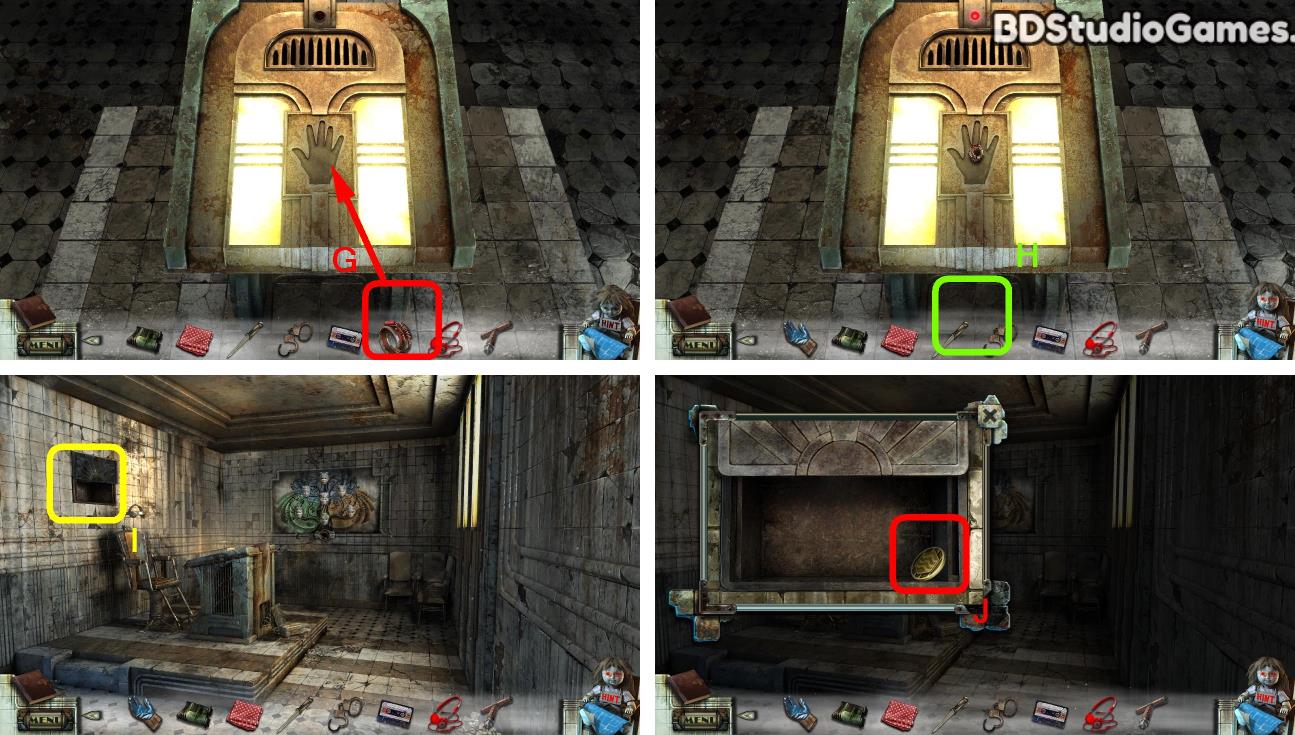
Use object on here. (G)
Go Here. (H)
Examine here. (I)
Take it. (J)
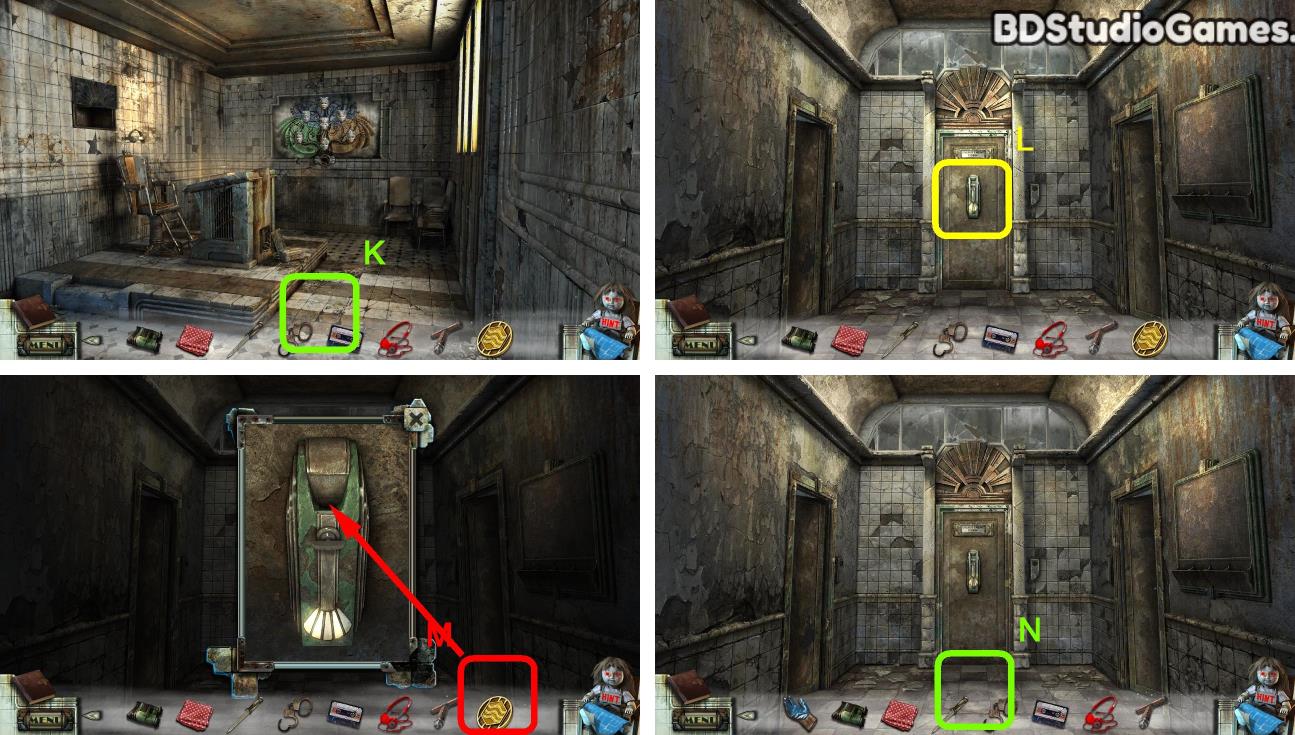
Go Here. (K)
Examine here. (L)
Use object on here. (M)
Go Here. (N)
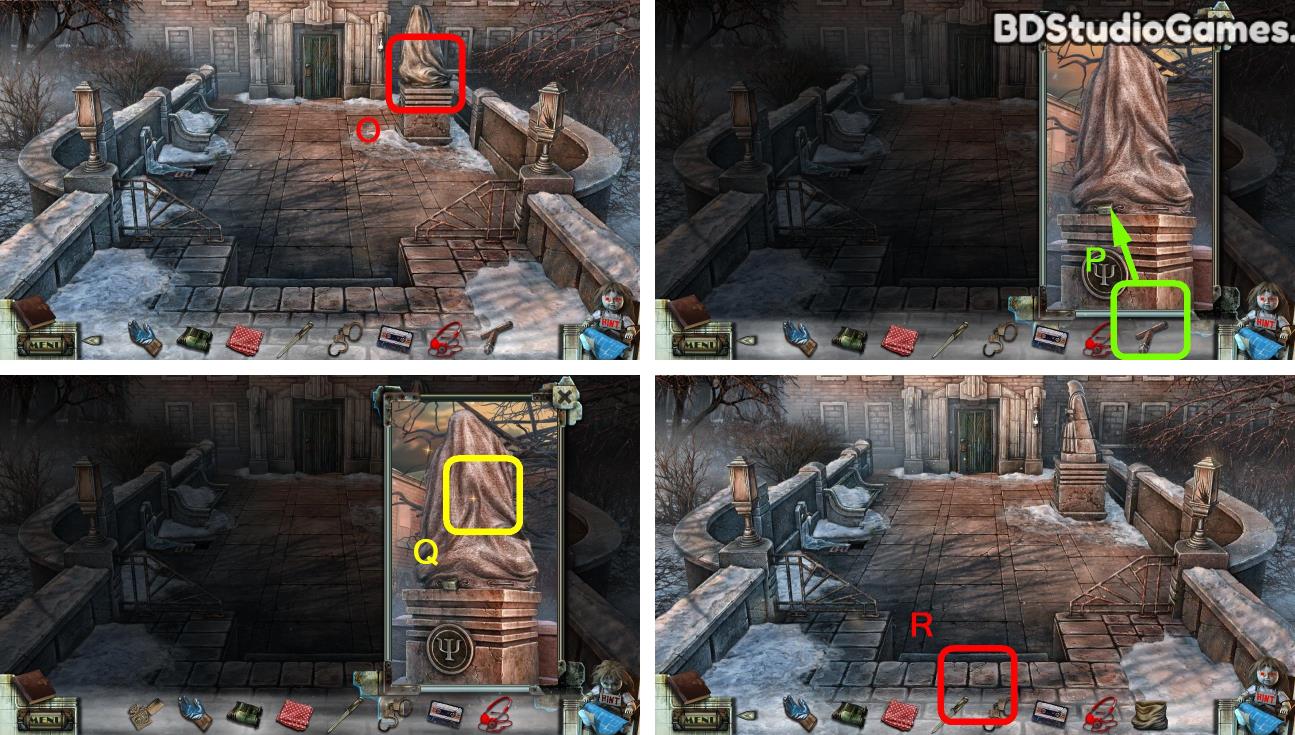
Come to this place.
Examine here. (O)
Use object on here. (P)
Take it. (Q)
Go Here. (R)
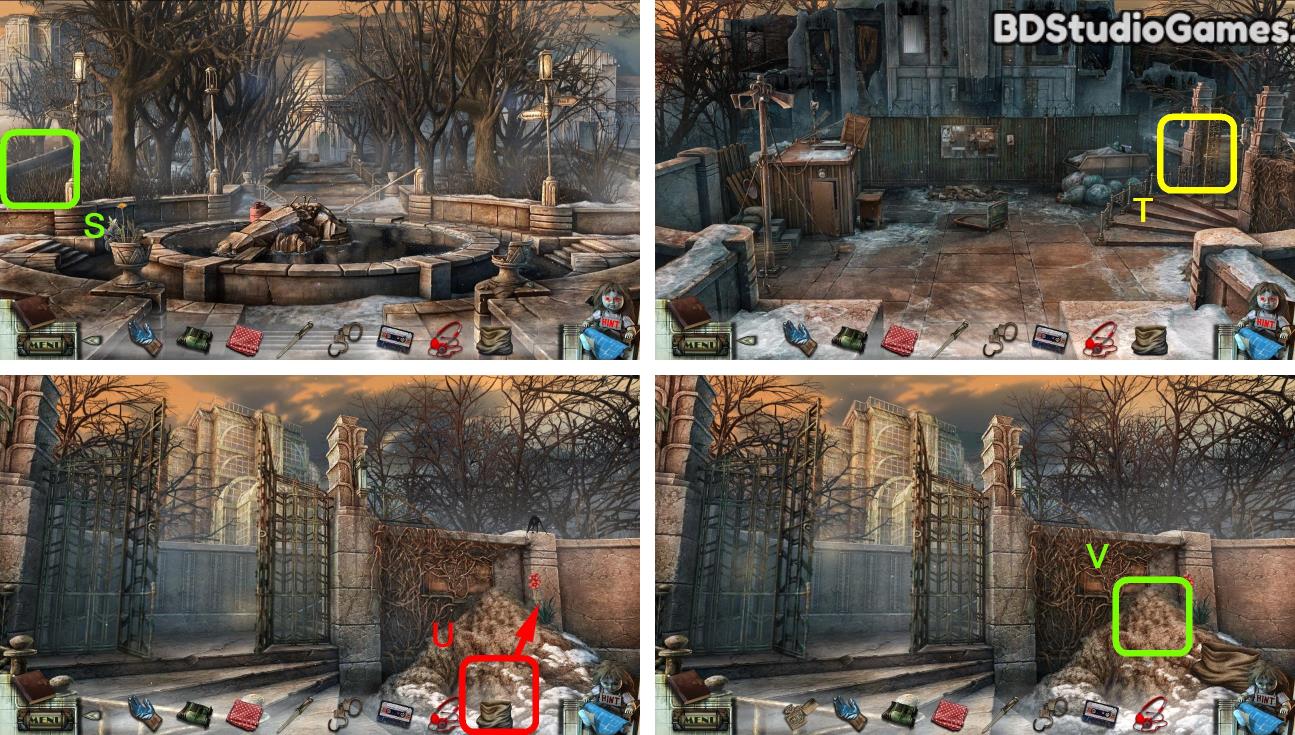
Click Here. (S)
Go Here. (T)
Use object on here. (U)
Click Here. (V)
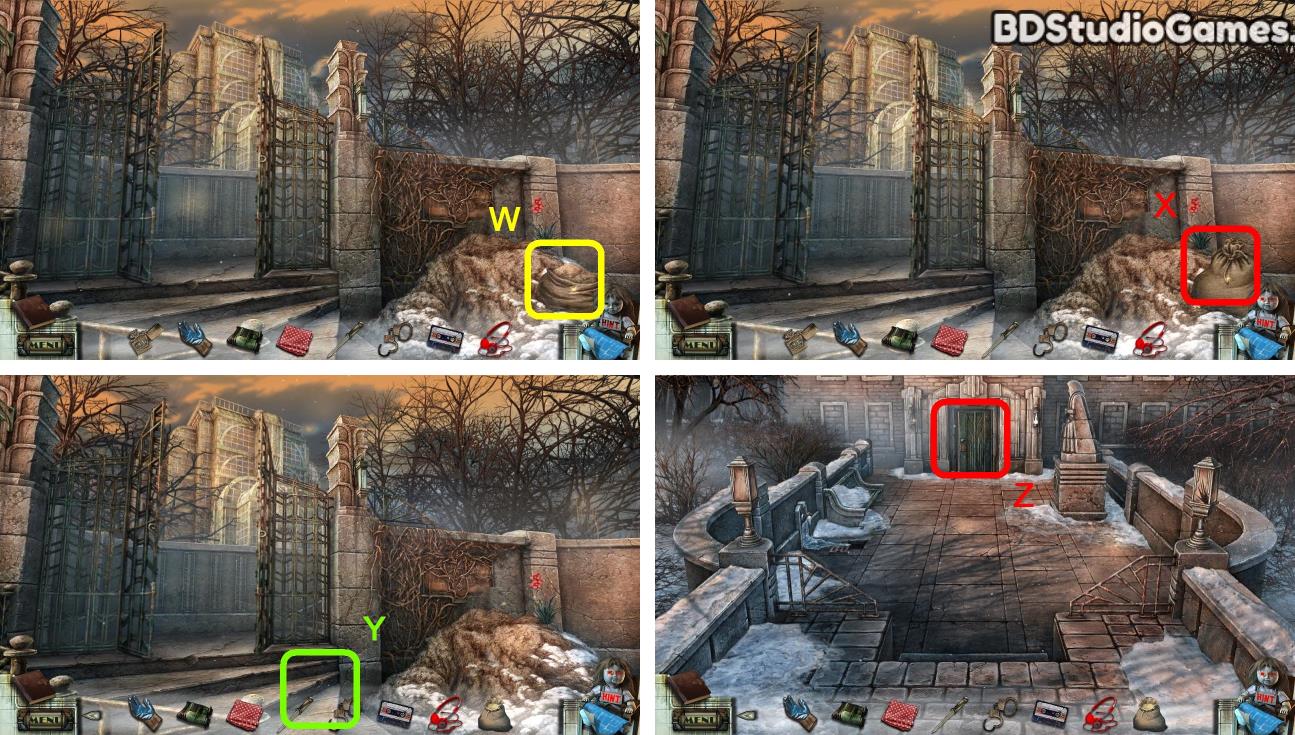
Click Here. (W)
Take it. (X)
Go Here. (Y)
Come to this place.
Go Here. (Z)
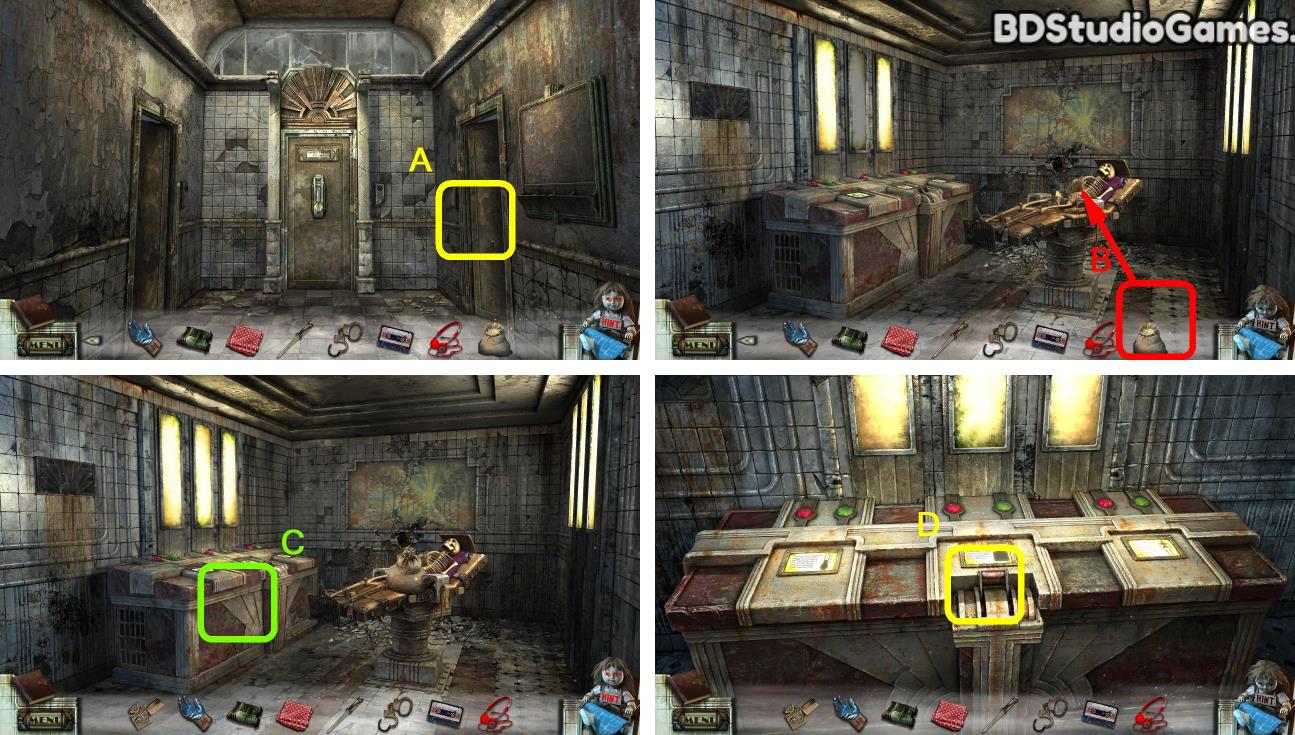
Come to this place.
Go Here. (A)
Use object on here. (B)
Examine here. (C)
Click Here. (D)
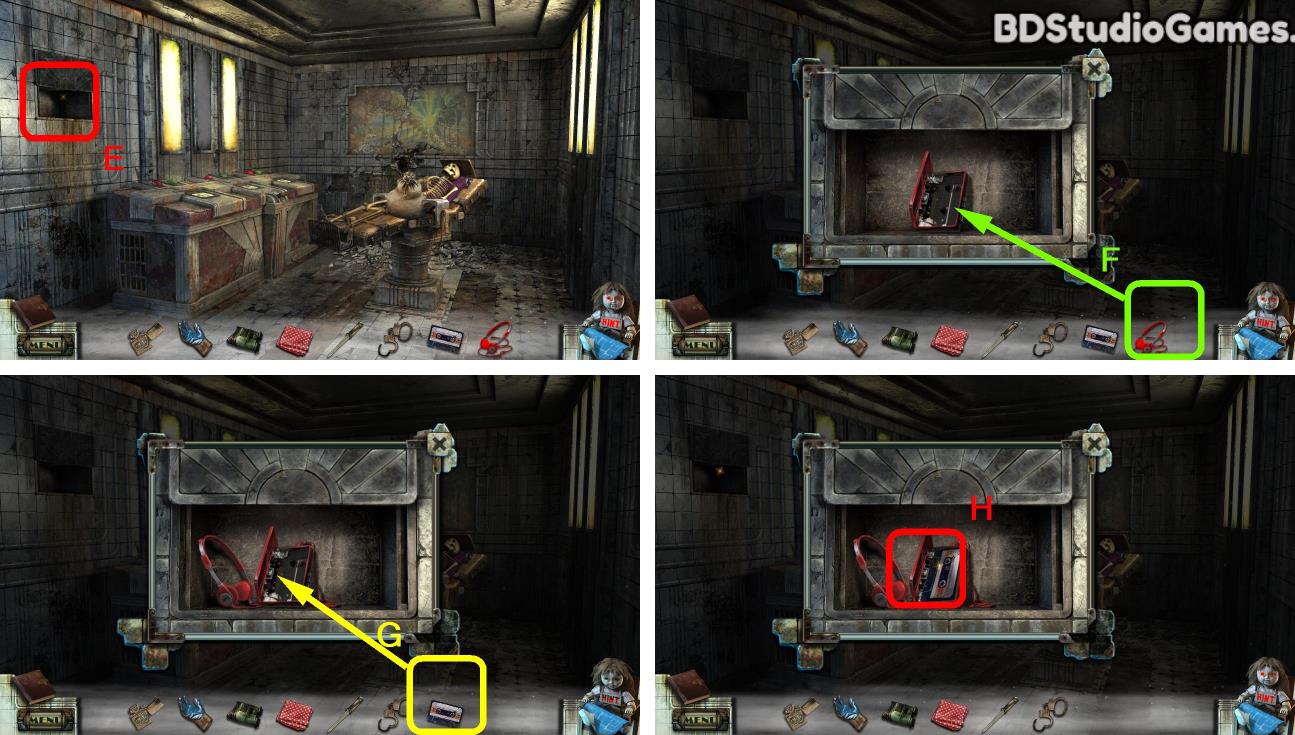
Examine here. (E)
Use object on here. (F)
Use object on here. (G)
Click Here. (H)
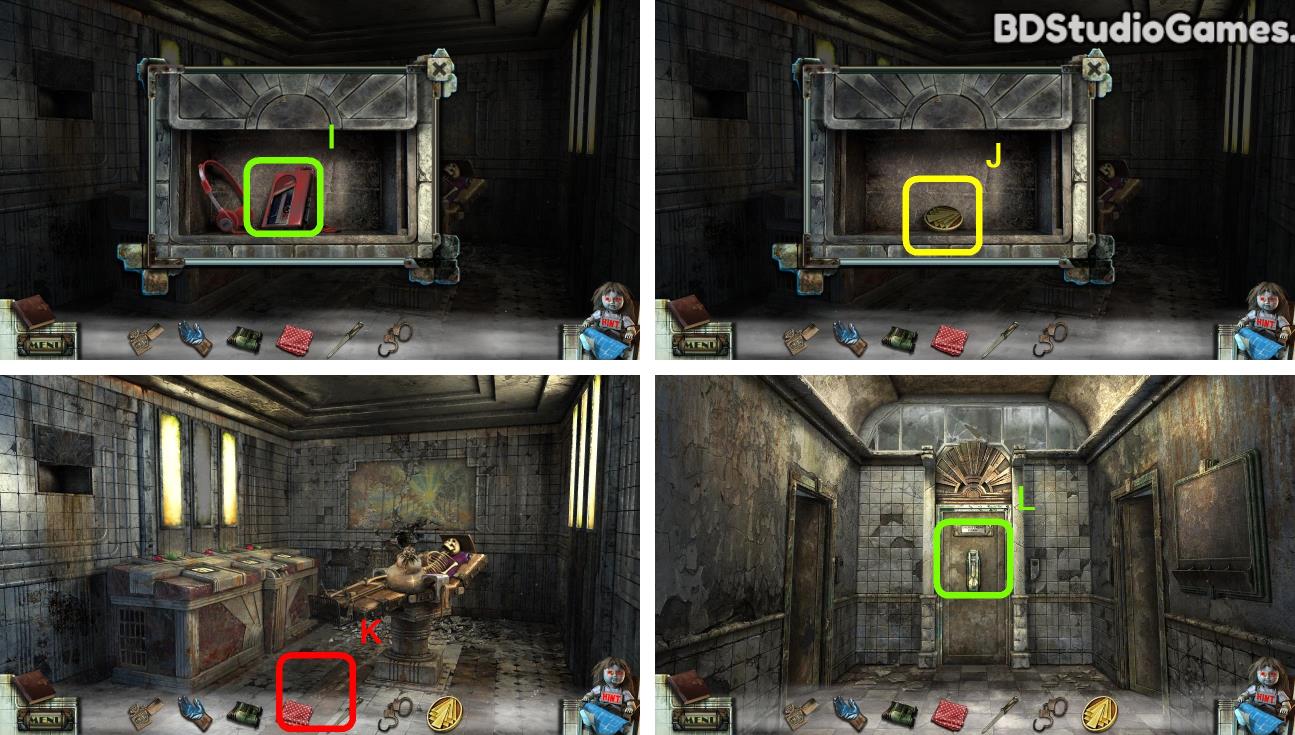
Take it. (I)
Take it. (J)
Go Here. (K)
Examine here. (L)
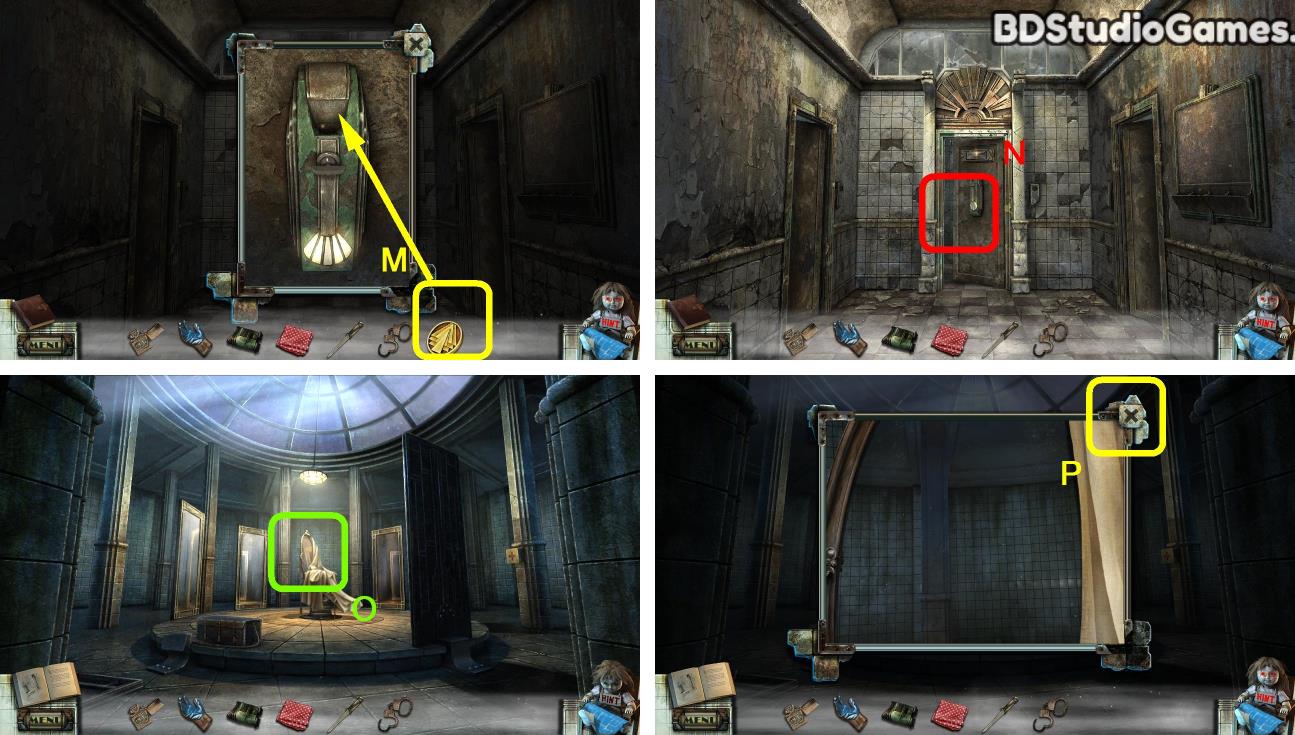
Use object on here. (M)
Go Here. (N)
Examine here. (O)
Click Here. (P)
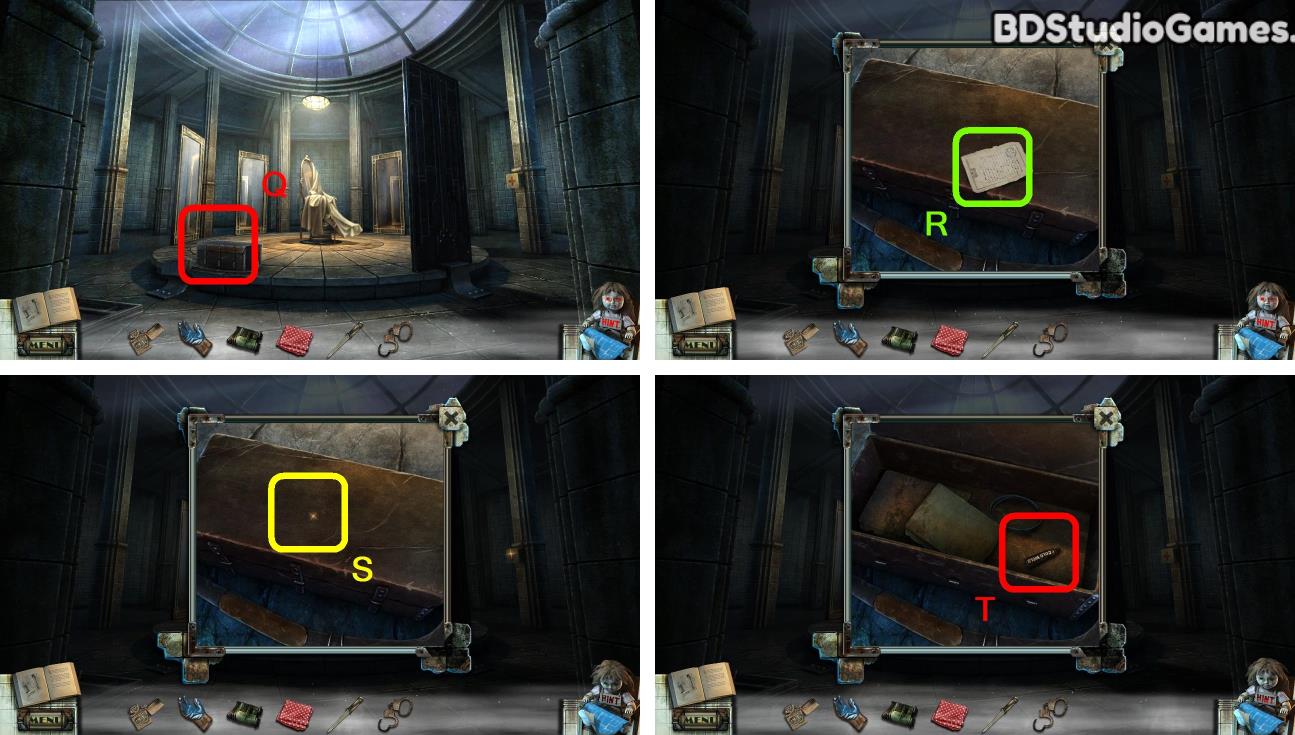
Examine here. (Q)
Click Here. (R)
Click Here. (S)
Take it. (T)
Examine here. (U)
Click Here. (V)
Take it. (W)


 REFRESH